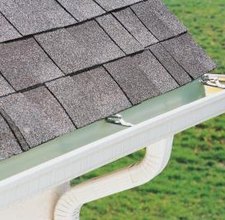
Installing gutters on rooftop eaves is important home maintenance, but can be difficult. Gutters on the eaves are necessary to catch and channel moisture and other debris that collects on the roof. The gutters collect rain and snow, carrying it away from the edges of the roof down to the ground. Without gutters, moisture and debris will drain right down the side of your home, and this could damage the home's finish, windows and doors. Correct installation needs precise measuring and care.
Instructions
Things You'll Need
- Ladder
- Tape measure
- Hand saw
- Caulk
- Rivets
- Gutter sealant
- Black marker
- Chisel
- End caps
- Gutter outlets
- Gutter pipe
- Hammer
- 1-inch roofing nails
- Chalk string
- Level
- Pitcher
- Gutter flashing
- Gutter hangers
- Power drill
- Crimping tool
- 1Inspect the eaves all the way around the home. Search for rotting and weak areas; repair these areas before attempting to attach gutters.
- 2Measure the entire perimeter of your home, recording each measurement from corner to corner. Each one of these measurements represents a length of gutter.
- 3Count each right and outside left and record the amount for each; this represents the end caps you'll need for the gutter system.
- 4Measure from the base of the eaves down to the ground to know how long your downspouts need to be. Add 4 feet to these measurements.
- 5Cut all gutter pieces to size with a hand saw based upon the measurements you recorded, leaving an extra 2 to 4 inches on each piece.
- 6Assemble large sections of the gutter on the ground for safety and efficiency. Place edges of gutter pieces together with an overlapping edge 2 to 4 inches wide, and hold them together with caulk and rivets. Repeat this overlapping process with corner pieces as well.
- 7Attach end caps and seal them in place with gutter sealant.
- 8Mark downspout locations on the bottom of gutters using a black marker. Downspouts are commonly placed at either end of gutter runs, or directly in the middle of the run.
- 9Place the gutter outlet over the mark, flange-side down.
- 10Cut a V-shaped notch into the gutter where the outlet will be placed, using a chisel.
- 11Cut notches into each planned downspout location along each gutter run.
- 12Drive a nail into the eaves of the home, 1/2 inch below the shingles, on the high point of the gutter run. Gutters must be placed so they slope toward the downspouts; otherwise, the water and debris will not run through the pipes to drain away.
- 13Measure 10 feet from the nail and drive a new nail into the eaves, 1/4 inch lower than the first. Check the slope between nails with a level; the bubble should show that the slope is off-center. Use a chalk string to mark the line where the gutter will be placed so you don't lose the slope.
- 14Screw gutters into the eaves at the nail marks. Pour a pitcher of water slowly into the gutters on each side of the house to check functionality.
- 15Slide gutter flashing under the shingles, securing it in place with 1-inch roofing nails every 2 feet. The edges of the flashing will be overlapped approximately 2 inches at each end.
- 16Install gutter hangers every 2 feet to give the gutter piping support. Drive the hanger screws directly through the flashing and the gutter right into the eaves with a power drill.
- 17Screw an elbow into the outlet of the first downspout you want to attach.
- 18Hold an elbow against the wall where you will attach the downspout and measure the space between outlets. Add 1 1/2 inches to the length to allow for overlap.
- 19Cut the downspout tube to size based upon your measurement with a hand saw.
- 20Crimp the ends of the downspouts where they will connect to the gutter with a crimping tool; otherwise, the downspouts won't fit into the pipe.
- 21Attach the downspouts to the wall with U-shaped brackets, placing the crimped end of the downspouts into the pre-cut notches you made earlier.
- 1
Tips & Warnings
- Check local weather reports and choose a fair day to install gutters.
- Wear eye and hand protection when cutting metal.
- Have a second person hold the ladder in place as you move up and down it to work on installing gutters.
Read more: How to Install Gutters on Rooftop Eaves | eHow.com http://www.ehow.com/how_12204521_install-gutters-rooftop-eaves.html#ixzz1mY4cVEl0
No comments:
Post a Comment